For this example, we need to build 2 Actions,
- Login to QBank
- Logout from QBank
Create action, Login to QBank
1. Click on "+" icon in the top toolbar and select, "Action".
2. Provide following information in the modal:
|
Name |
Login to QBank |
|
|
|
Context where this Action belongs |
Login Page |
|
|
Destination Context |
Account Summary Page |
3. Click on "Save & Continue"
Building Action Logic for Login Action
Let's now build logic for this Action. Here is how you would login to the application, in plain English.
Enter john.todd in the user name field
Enter pass123 in the password field
Click on Sign In button
Action logic is all about writing statements for this task. Follow procedure below for each step.
1. Click on the "Views" tab in the (center) bottom of Action entity page.

2. Hover to the User Name field on the screen and right click. Select "enter text in element"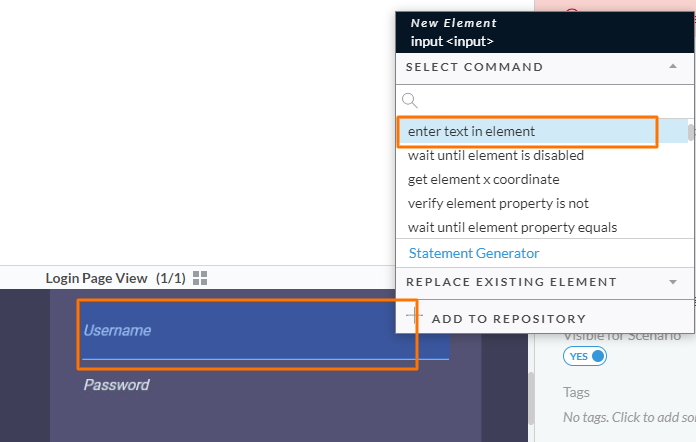
3. Now, in the logic editor screen, enter the text you want to type (john.todd) and provide a name to the element (Username Input).
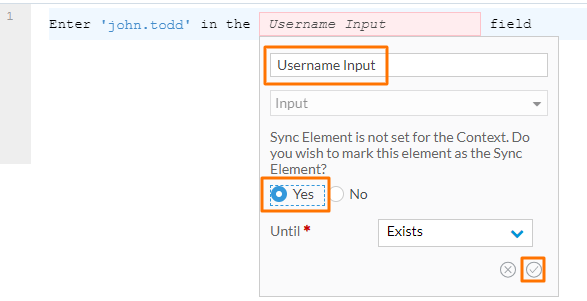
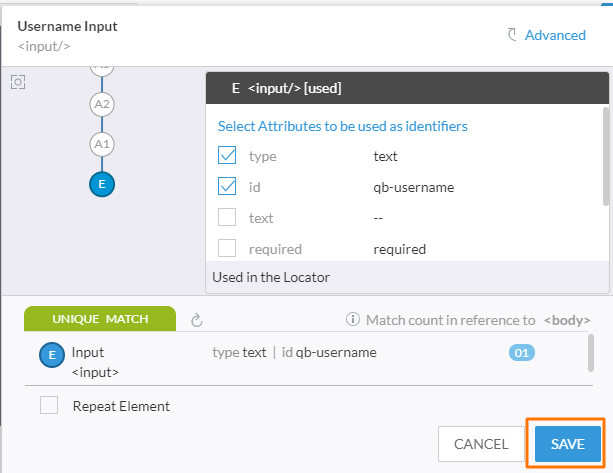
4. Since this is the first time you are dealing with this element in your logic, you will be presented with a screen to review and confirm element identification criterion. Just click "Save" here.
Repeat the 4 steps above for entering the password (by hovering on the Password field) and clicking the Sign In button. Here is how your logic should look like.

Create Action, Logout from QBank
Here are the details for this action:
|
Name |
Logout from QBank |
|
|
|
Context where this Action belongs |
Account Summary Page |
|
|
Destination Context |
Login Page |
|
|
Logic |
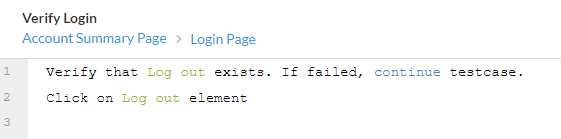
Verify that logout button exists Click on logout button |
For the logic, you hover on the Logout button and select "verify element exists" for the first statement and then "click" for the second statement. When done, here is how your logic should look like.
Next Steps
Now that we have the Actions built, we will assemble the automates Scenario for execution.

Comments
0 comments
Please sign in to leave a comment.